This site contains affiliate links to products, and we may receive a commission for purchases made through these links.
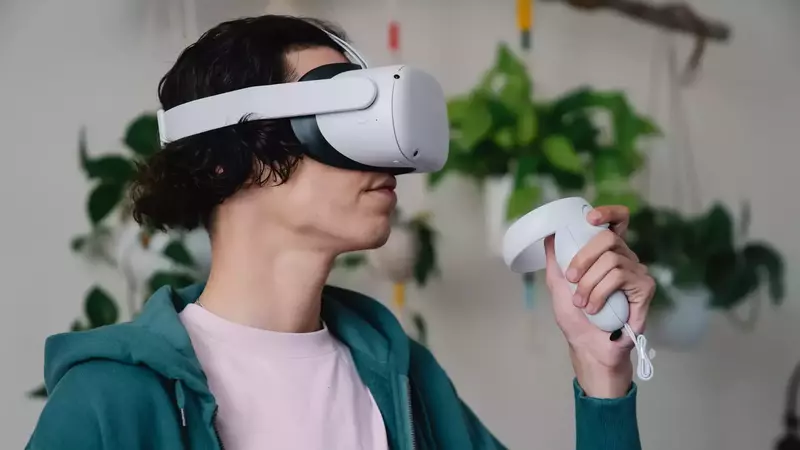
The Meta Quest 2 is the latest and most incredible virtual reality headset on the market. It offers an immersive experience that is unmatched by any other VR device. However, you may be wondering; can you connect the Meta Quest 2 to a TV?
You can connect Meta Quest 2 to your TV using Chromecast. First, you need to set up Chromecast on your TV. Then, open the Oculus app on your Quest and go to Settings -> Devices -> Audio and Video -> Screen Casting. Select your TV from the list of devices, and you should be good to go!
In this article, I will give you a step-by-step guide on connecting Meta Quest 2 to your TV and discuss some of the benefits of doing so.

Can You Connect The Meta Quest 2 To A TV?
When connecting Meta Quest 2 to your TV, you will need the following:
- Chromecast
- Meta Quest headset
- A compatible TV with an HDMI port
- Smartphone with the Oculus App
14 Steps to Follow When Connecting Meta Quest 2 to Your TV
You can connect the Meta Quest two in two ways, either by using the headset or your phone.
1. Power on Your TV and Meta Quest 2
You need to make sure that your TV and Meta Quest are powered on. If you’re using a Chromecast, insert it into an HDMI port on your TV.
2. Ensure Both Devices Use the same Wi-Fi
This will help ensure that the connection between your Meta Quest and TV is as smooth as possible.
3. Press the Key on the Right-Hand Controller
There should be a key with the Oculus logo on it on the right-hand controller. Press and hold this key.
4. Click the Share Button
Once you have pressed and held the key on the controller, a menu should appear on your TV screen. Select the share button from this menu.
5. Click the Cast Button
In this sharing window, you should see the “Cast to Device” button. Click on this button, and select your TV from the list of devices that appears.
6. Choose Your TV’s Name
You should be able to see the name of the device that you have enabled Chromecast; select its name.
7. Confirmation Pop Up
After you’ve selected the name of your TV, a confirmation pop-up will appear on your Quest. Select “Next” to begin casting.
8. Phone/ Oculus App
You can also connect Meta Quest 2 to your TV using the phone through the following steps:
9. Download the Oculus App
The first step is to make sure that you have downloaded the Oculus App on your phone. You can find this app in the App Store or Google Play Store.
10. Open the Oculus App
Once you have downloaded and installed the app, open it up. Sign in with your Facebook account or create a new one if you don’t have one already.
11. Switch On the TV
Make sure that your TV is turned on and connected to the same internet that the Quest is using.
12. Click the Casting Button
In the top right corner of the app, there should be a “Casting” button. Click on this button and select your TV from the list of devices.
13. Tap the Arrow Next to “This Phone”
In the next window, you should see an arrow next to “This Phone.” Tap on this arrow and select your TV from the list of devices.
14. Choose Your TV’s Name
You should now be able to see the name of your TV. Select it, and a confirmation pop-up will appear on your Quest. Select “Next” to begin casting.
Benefits of Connecting Meta Quest 2 to TV
There are a few benefits of connecting Meta Quest two to your TV.
1. More Enjoyable Experience
The first and most obvious benefit is providing a more enjoyable experience. When you’re playing games or watching movies on a big screen, it’s just more immersive and fun.
2. Share With Friends and Family
Another great benefit is sharing the experience with friends and family. If you have kids, they’ll love being able to watch their favorite shows on the big screen. And if you’re playing a game, it’s always more fun with friends.
3. Better Battery Life
One final benefit is that it can help to improve battery life. When the Quest is connected to your TV, it doesn’t have to work as hard to display the image, which can help to conserve the battery.
Tips for Getting the Best Experience When You Connect Meta Quest 2 to TV
Now that you know how to connect Meta Quest 2 to your TV, here are a few tips to make the most of the experience:
1. Make Sure the Area Is Well Lit
Since you’ll be using the Quest’s built-in display, it’s crucial to ensure that the area is well lit. This will help to reduce eye strain and make the experience more enjoyable.
2. Use a Wireless Controller
If you’re playing games, I recommend using a wireless controller. This will free up your hands and make it easier to move around. You will have to re-pair your controllers after every use, but it’s worth it for the freedom.
3. Adjust the Settings
If you’re having trouble connecting or the image is fuzzy, try adjusting the settings in the Oculus App. You can usually find the settings under “General” or “Display.”
READ MORE! 18 Tips & Tricks For Oculus Quest 2 (You Need To Know!)
How to Stop Casting Meta Quest 2 to TV
Once you’re done casting Meta Quest to your TV, there are a few different ways that you can stop the process:
1. Click the “Stop Casting” Button in the App
The easiest way to stop casting is to click the “Stop Casting” button in the Oculus App. This can be found in the top right corner, next to the “Casting” button.
2. Using the Headsets
You can stop casting using the headsets by pressing and holding the Oculus button. This will bring up a menu to select “Stop Casting.”
Final Thoughts
You can connect the Meta Quest 2 to your TV using the Oculus App or the headsets. This will allow you to enjoy a more immersive experience and share it with friends and family.
You need to take note of the tips provided in this article to get the best VR experience.
I hope this article has helped you learn how to connect your Meta Quest 2 and its benefits.

Espen
Espen is the Director of PursuitMeta and has written extensively about Virtual Reality and VR Headsets for years. He is a consumer product expert and has personally tested VR Headsets for the last decade.


Leave a Reply