This site contains affiliate links to products, and we may receive a commission for purchases made through these links.
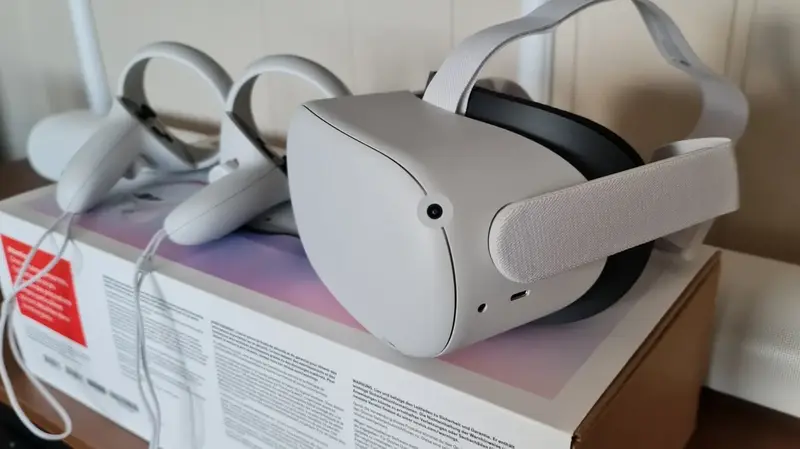
I’ve been using the Quest 2 almost constantly since I received it, and it’s become my go-to VR headset due to the convenience of using it in standalone mode and the freedom that it provides when playing pc VR content wirelessly using a virtual desktop.
And in my time with the headset, I’ve learned a few things about it that I thought was worth sharing. Many of these tips will apply to the original Quest as well as other VR headsets on the market.
So, in this article, I’ll share my top 18 tips & tricks for Oculus Quest 2. I’ve included various tips that should be useful whether you’re new to VR, an experienced VR user, or even a VR content creator.
Tip 1: Can you Use The Oculus Quest 2 In The Dark?
The first tip I’d like to provide is regarding utilizing the Quest 2 in the dark. While the Quest’s tracking is fairly strong and works well in most lighting settings and even with green screens, it does not work very well in the dark.
You can, however, use an infrared illuminator, which is mostly invisible to the human eye but visible to the Quest’s tracking cameras, similar to how infrared is used in CCTV cameras to help them see in the dark.
The infrared illumination I use comes with a power adaptor. However, you can use it with a battery pack, which is supplied separately if you choose.
I put this to the test while recording my Blair Witch gameplay in a dark woodland area, and I was pleasantly impressed at how well it worked. If you intend to utilize this solution, please avoid looking directly into the IR light when it is switched on.
Tip 2: How to Protect Your Oculus Quest 2 While Traveling
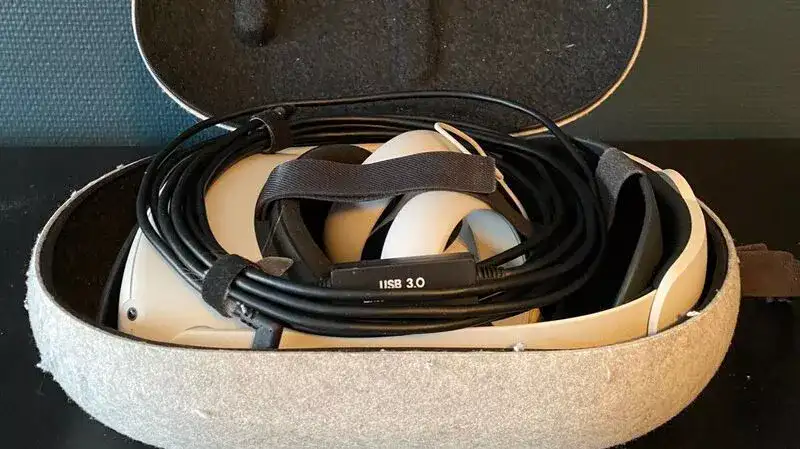
The following tip is about carrying cases. If you want to take your Quest 2 somewhere, it’s best to use a protective case because the displays behind the lenses, in particular, can be damaged by direct sunlight.
You can use the Quest 2 in the original Quests carry case if you have the original soft strap or the official elite strap installed. This may be useful if you can find one for a low price or if you still have one from the original Quest.
To make it fit inside the case, simply place the Quest 2 upside down. Because the controller slots don’t fit the Quest 2 control rings very well, I’d recommend using a lens protector in case the controllers come loose while traveling.
Unfortunately, the elite battery strap will not fit in the original quest case. It’s a little thicker in the back, but this isn’t really a problem because the elite battery strap is only available with the official Quest 2 carry case.
Tip 3: How To Change The Default Home Environment in Quest 2
In Quest 2, you can change the default home environment by going to “settings” and then “virtual environment.”
You have a few options here, including a pass-through environment that allows you to see the real world around you while navigating the menus. This will be ideal if you have children or pets that you want to keep an eye on while in VR.
Tip 4: Remember To Stay Hydrated
The next tip may appear strange, but it is about staying hydrated. You can become so caught up in your favorite virtual reality game that you forget to drink anything for hours on end.
To stay hydrated and in peak condition, use a water bottle with a straw built into the cap. This allows you to take a quick drink without removing the headset and making a complete mess.
It may appear silly, but this has become an essential part of my virtual reality setup.
Tip 5: How To Enable Hand Tracking With Oculus Quest 2
The following tip is about hand tracking. This feature truly distinguishes the Quest and Quest 2 from the competition, as hand tracking is built-in to very few VR headsets on the market.
When the controllers are not in view of the headset, you can enable a setting that causes hand tracking to activate automatically. This is especially useful if you just want to put on the headset to download a game or watch your favorite VR YouTube channel without having to pick up your controllers.
To enable this, navigate to “Settings” > “Device” > “Hands and controllers” and select “Hand tracking.” Enable “Auto-switch between hands and controllers” as well.
I can’t wait for apps like VR chat and big screen to use hand tracking because controllers aren’t really necessary for those types of applications. It would make hand gestures in those social applications more natural.
Tip 6: How To Increase Audio Quality With Oculus Quest 2
The following tip is about audio. Now, the audio built into the Quest 2 is absolutely fine for the most part, but if you want the best audio experience, I would highly recommend using a pair of over-ear headphones.
The issue with using headphones is that most of them come with a really long cable that can get in the way while you’re playing.
Unfortunately, we can’t completely eliminate the cable by using Bluetooth headphones right now because the Bluetooth latency is simply too high while playing games.
However, if your headphones have a removable 3.5-millimeter headphone jack, such as these Steel Series Arctis 1 headphones, you can purchase a short 30-centimeter replacement cable, which is the ideal length to keep everything neatly out of the way.
The nice thing about this one is that it has a right-angle jack on one end that goes into the headset and a straight jack connector on the other end that goes into your headphones. It’s a cheap but effective way to improve the experience of using headphones with the Oculus Quest 2.
Tip 7: How to Activate the Pass-Through Mode on Quest 2
At any time, you can double-tap either side of the Quest 2 with your hand to reveal the pass-through mode. This is extremely useful if you need to get a glimpse of the real world around you.
Simply double-tap it again to return to your virtual reality game or experience. If this feature isn’t enabled by default, you can enable it in the settings menu’s experimental features section.
Tip 8: How to Adjust The IPD Settings On Quest 2
The following tip is about IPD. IPD stands for interpupillary distance, which is the distance between your eyes. Adjusting the headset to be as close to your IPD as possible will provide the most comfortable VR experience and prevent eye strain.
I imagine that in the future, headsets with eye-tracking will be able to auto-calibrate themselves to adjust to the wearer, but we’re not there yet. For the time being, we must approximate our own IPD spacing to make the necessary adjustments.
You can obtain your own IPD from your optician or simply measure it yourself. You can do this in a mirror by measuring the distance between the centers of each of your pupils with a ruler. If you have an iPhone, you can use an app called “eye measure” to do it for you. It’s completely free.
The Quest 2 has three IPD settings that can be manually adjusted; try to get it as close to your own IPD as possible. The first setting is 58 millimeters, the second is 63 millimeters, and the third is 68 millimeters.
If any of these settings don’t feel quite right, carefully move the lenses to sit in between some of these settings, and it should be fine. I hope this was helpful.
Tip 9: How To Cast Your Oculus Quest 2 To Other Devices
The following tip is about sharing your virtual reality experience. VR is fantastic, but sometimes you want to share the experience with your friends and family so they can see exactly what you’re seeing inside the headset while you’re playing.
By going to sharing in the headset’s main menu and selecting cast, you can easily cast your gameplay to a phone using the oculus app. This will display a list of devices to which you can cast as long as they are all connected to the same network.
If you have a Chromecast device connected to a TV, you can also cast to it. If you want to cast to your computer using a chrome or edge browser, go to oculus.com/casting, and your computer will appear in the casting menu inside the headset. This will broadcast both the gameplay and the audio.
Tip 10: How To Take Screenshots In Oculus Quest 2
If you’re in a game or experience and something epic happens, you can take a screenshot by pressing and holding the Oculus button on the right controller and tapping the trigger.
This will be saved to your headset directly. Connecting your headset to a computer and navigating to the “Oculus folder” and then “screenshots” will give you access to the screenshots. If you prefer, you can also share them directly on a Facebook page.
Tip 11: How to Factory Reset Your Oculus Quest 2
If you’re having trouble with your headset, or if you’re selling it or giving it to a friend or family member so they can log in with their own account, the following tip will come in handy.
To factory reset the headset, turn it off and press and hold the power and volume down buttons together for about 10 seconds.
This will put the headset into USB update mode, from which you can select factory reset in the menu by moving the volume buttons up and down and selecting with the power button.
Be aware that when you use the factory reset function, all of your data, including save games, will be erased from the headset.
Tip 12: How Remove Your Quest 2 Without It Turning Off
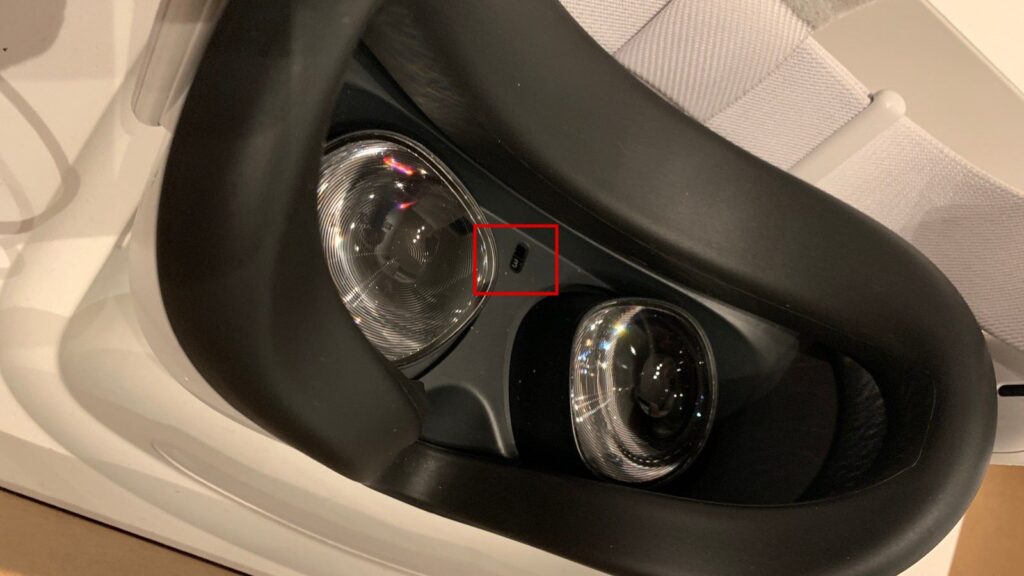
The following tip is for VR content creators who want to record or live stream their VR games to share online.
I cover up the Quest’s internal proximity sensor, which is located just above the IPD indicator, with a small amount of blu-tack or something similar.
This allows you to remove the headset without causing the display to turn off, allowing you to continue viewing your live stream when using a Chromecast or pc casting.
Please keep in mind that if you place the Quest on the floor or on a table, it will time out if it detects no movement after a short period of time. Hopefully, this will be useful to some of you virtual reality content creators out there.
Tip 13: How To Recenter Your Play Space With Quest 2
If you move around your play area and find that things aren’t quite centered correctly, simply press and hold the Oculus button on the right controller to recenter your play area.
Tip 14: How to Prevent Breaking Things Around You When in VR
The following tip will assist you in remaining safe while using virtual reality.
The oculus boundary system is adequate, but I prefer to use something on the floor in addition to the boundary system so that I can always tell where the center of my play space is simply by the texture beneath my feet.
You could now purchase a product like the proxy mat, or you could simply use a small rug or piece of carpet. I set it up so that when I’m on the proxy mat, I can punch out in all directions without collapsing against any walls or furniture.
As long as I’m on the mat, I have the confidence to play games like Super Hot and Gorn without worrying about punching my walls or damaging my controllers.
This can also be useful for content creators to ensure that when they stand on the mat, they are centered on the camera.
Tip 15: Can I Use Lens Inserts Inside a Oculus Quest 2?
If you wear glasses in VR, this next tip will come in handy. Instead of glasses, lens inserts inside the headset can be used to sharpen things up a bit.
It’s possible to wear glasses inside a VR headset, but rubbing the two together may scratch the lenses of your glasses and the lenses of your VR headset, which can be an expensive mistake.
Prescription lens inserts are quick and easy to attach and can stay inside your headset so that they are always ready to use.
There are a few different companies that make these, but the one I recommend is WIDMOvr.
Tip 16: How To Get Firmeware Updates To Quest 2 Faster
Oculus is constantly pushing out new updates, and the automatic rollout system can be a little random in terms of when you’ll get the update.
I’d recommend checking for the latest updates under the about sections of the settings menu and manually checking for the latest updates on a regular basis.
This way you’ll get the updates faster than having to wait for the system to update itself.
Tip 17: How To Get A Refund From The Oculus Store
This next tip will come in handy if you purchase a VR game or experience from the Oculus store but are dissatisfied with your purchase for whatever reason. You can easily request a refund using the Oculus mobile app.
The only requirement is that you’ve played the game for less than two hours and that you’ve done so within 14 days of purchasing it.
Simply go to settings in your Oculus app and click purchase history, select the game or experience, and then select refund. It really is that quick and simple.
Tip 18: How To Get Early Access to Games With Oculus Quest 2?
The final and most important tip I have for you is to look into the content available through Sidequest. Sidequest hosts experimental virtual reality games and experiences that aren’t available on the official Oculus store.
This is completely safe, and I’d like to emphasize that it in no way promotes piracy.
Many of the resources available are completely free to use, such as Hyperdash, Pavlov, and the virtual desktop patch, which is required to play PC VR content wirelessly on both Quest and Quest 2.

Espen
Espen is the Director of PursuitMeta and has written extensively about Virtual Reality and VR Headsets for years. He is a consumer product expert and has personally tested VR Headsets for the last decade.


Leave a Reply